Dollhouse Blogs

Sunday 20 December 2015

Holiday wishes and library progress!

Hello everyone,

Happy holidays!
 
The week before Christmas is always a little hectic, so I wanted to take a minute and wish you all the a very merry Christmas and a happy New year, or any other holiday you celebrate!
 
 
May you be surrounded with people you love and who love you...


and may you always have enough of everything you need and your heart desires


Happiness, health, love, prosperity and comfort to all!
 
Questions:
 
I was asked 2 questions  last time I posted. Firstly, I studied interior design which is where I learned about space planning. As for the rest, most of my miniature techniques were self thought through reading books, blogs and watching a few videos.
 
Secondly, I rarely listen to music when I work on my minis. I can't stay still when music is playing. However, I do have a collection of dvds that I put on as background noise: Royal Upstairs Downstairs, Treasure houses of Britain, Miss Marple with Joan Hickson, Waiting for God, The Uninvited and Rebecca. 

Progress:

2 weeks ago I posted about the progress on the library. Since then I have been cutting out the wall panneling for the rest of second floor of the new wing.


The picture above is the wall paneling for the staircase behind the earl's office.


The staircase will lead to the new winter parlor and the banquet hall on the third floor.


The steps are 4 inches wide strips of MDF 5/8 inches high. I used a 3/4 inch spacer to get each step the same depth and glued the pieces with carpenter's glue and drops of gel super glue.


The door was a gift from Ray. It is a false door case, but I carefully cut out the door from the frame. The frame will be finished to look like stone and the door will be walnut. I will glue the door in place and you will just get a glimpse of a sink. This will give the illusion of a bathroom for guests. I have another bathroom on the third floor, but this way I will have one private and one for the public.

It took me a good day to measure and plan the staircase and paneling. Enjoy these pictures because once everything is glued down you will only be able to see this room through the doorway of the earl's office.


I decided to make the panel above the door a transom so as to see a bit more of the room and the staircase landing. The only other view will be from the library door.

The pictures above were my final dry run just to make sure I had cut out every single piece that needs to be faux walnut finished. I had planned to paint everything today, let it dry for a week, and assemble everything during the holiday break. I forgot one little, itty bitty detail....the lumber strips I which also need to be finished to look like walnut. This morning I took out my lumber and calculated everything I need to finish the rooms... and I was shocked!


Every single one of these pieces, including the staircase and door, with 2 coats of  water based paint and faux finished with oil paints. These are doorframes, baseboards, chair rails, crown molding, window mullions, panel detail... I have no idea why I did not realize there would be this much. It looks like my holiday will be spent painting instead of assembling.

And that is all for now my friends. Happy holidays from myself, Jo and Ozzy in real life...


 and from the earl and countess in mini life


Big hugs
Giac


Monday 7 December 2015

Library panels and bookcases, new renovation and vacation.

Hello my friends,

I hope you are all well and getting ready for the holidays. Thank you for your lovely comments about the ballroom in my last post. I was ready to start work on the ballroom floor, but 2 things happened: First, I made copies of the medallions I had designed and put them into place for a test run...


What was I thinking!!!

...I hated it! I felt it was completely wrong for the room so decided to go back to the drawing board. At this point I decided to keep the floor project for cold winter days and to work on the second floor of the wing because it will all be faux walnut finish. The finish is made with oil paints and I'd rather paint now so I can leave it outside a few hours to dry... the smell is really strong. So, ladies and gentlemen, I give you part 1 of the second floor.

Library panels

The panelled walls for the library will all be cut out of illustration board and backed with leftover MDF strips to give it the depth I want. The first step was to draw elevation plans for each wall.

My inspiration was a French Library from the Thorne Rooms
 
 
The library is inspired by 2 Thorne Rooms and libraries made by friend Ray Whitledge. When I had an idea of the direction I wanted, I cut out double thick illustration board templates for each wall.
 
All will be walnut with an off-white plaster ceiling

The mantels are from Sue Cook
 
When planning the panels I took into account the thicknesses of every molding piece, down to the last doorframe, to make sure everything lined up properly. When I was satisfied with my plans, I spend a weekend cutting out all the panels.


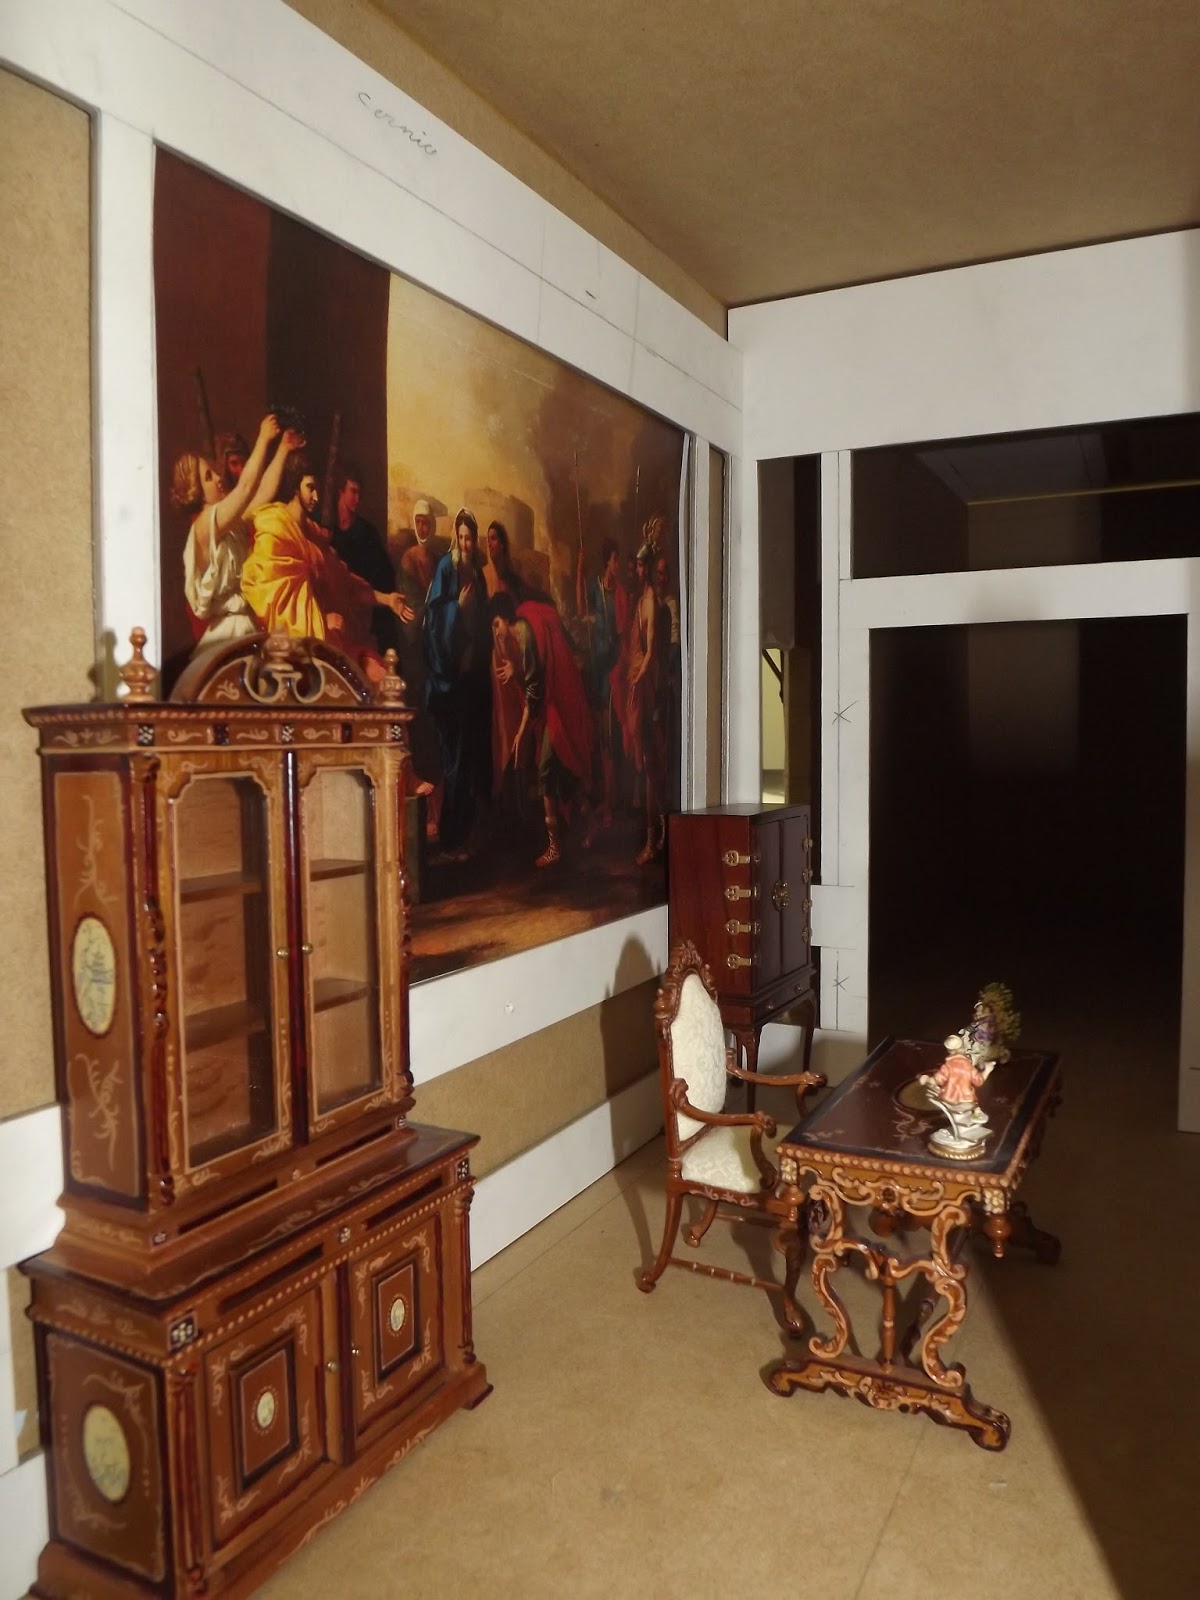
Since I was cutting illustration board, I also planned the earls office which will be to the left of the library


The furniture was in the gallery, but will be moved to the office to make more room for sculptures

The panel over the door might become a transom glass to let the light through

The painting on the left wall is from a book of one of my favorite painters, Nicolas Poussin. I will use more of his paintings for the panels each side of the fireplace, which will be marble with a niche incorporated into the over mantel.

Bookcases

With the panels done, it was time to work on the bookcases which are all made to look like built-ins. In the past, I simply glued shelves into place. however, each time I have to clean I am afraid they might come undone under the pressure of my fingers. This time I decided to cut grooved into the side panels for each shelf. this is really easy to do with a craft table saw...but I don't have a craft table saw. So, I did it the good old fashioned way!


I used my metal square to draw lines for each shelf, then scored half way down the thickness of the wood with my utility knife. When that was done, I used a jewelers screw driver to chisel out the groove


I had to do this for 30 shelves, which means 60 grooves. It took half a day, but was well worth it. In the next picture you can see the bookcases and compare with my original drawing.

The sides are 1/8 bassewood, the shelves are 1/16 bassewood, and the backs of the bookcases are double thick illustration board. They were assembled with The Utlimate Glue and dots of gel Super glue

The bookcases will be quite sturdy. Also, I plan on making glass doors for the top of the bookcases (you can see this in my drawing above) so the shelves should be safe. Before I glued the sides, top and bottom of the bookcases, I had a test run to make sure the shelves looked straight and that I liked the spacing of the shelves.


It looked good, so I decided to put the furniture I am thinking of using in place to see if the room worked.


I love a successful dry run. I then glued the bookcases except for the shelves. It will be easier to faux paint the back of the bookcase before the shelves are glued in place. The last pictures were taken on Sunday. This evening, Monday, I cut and glued down the bottom panels of each bookcase. Now you get a real feel for the finished library:


The under the bookcases is to accommodate the flooring. Any remaining gap will be covered with baseboards

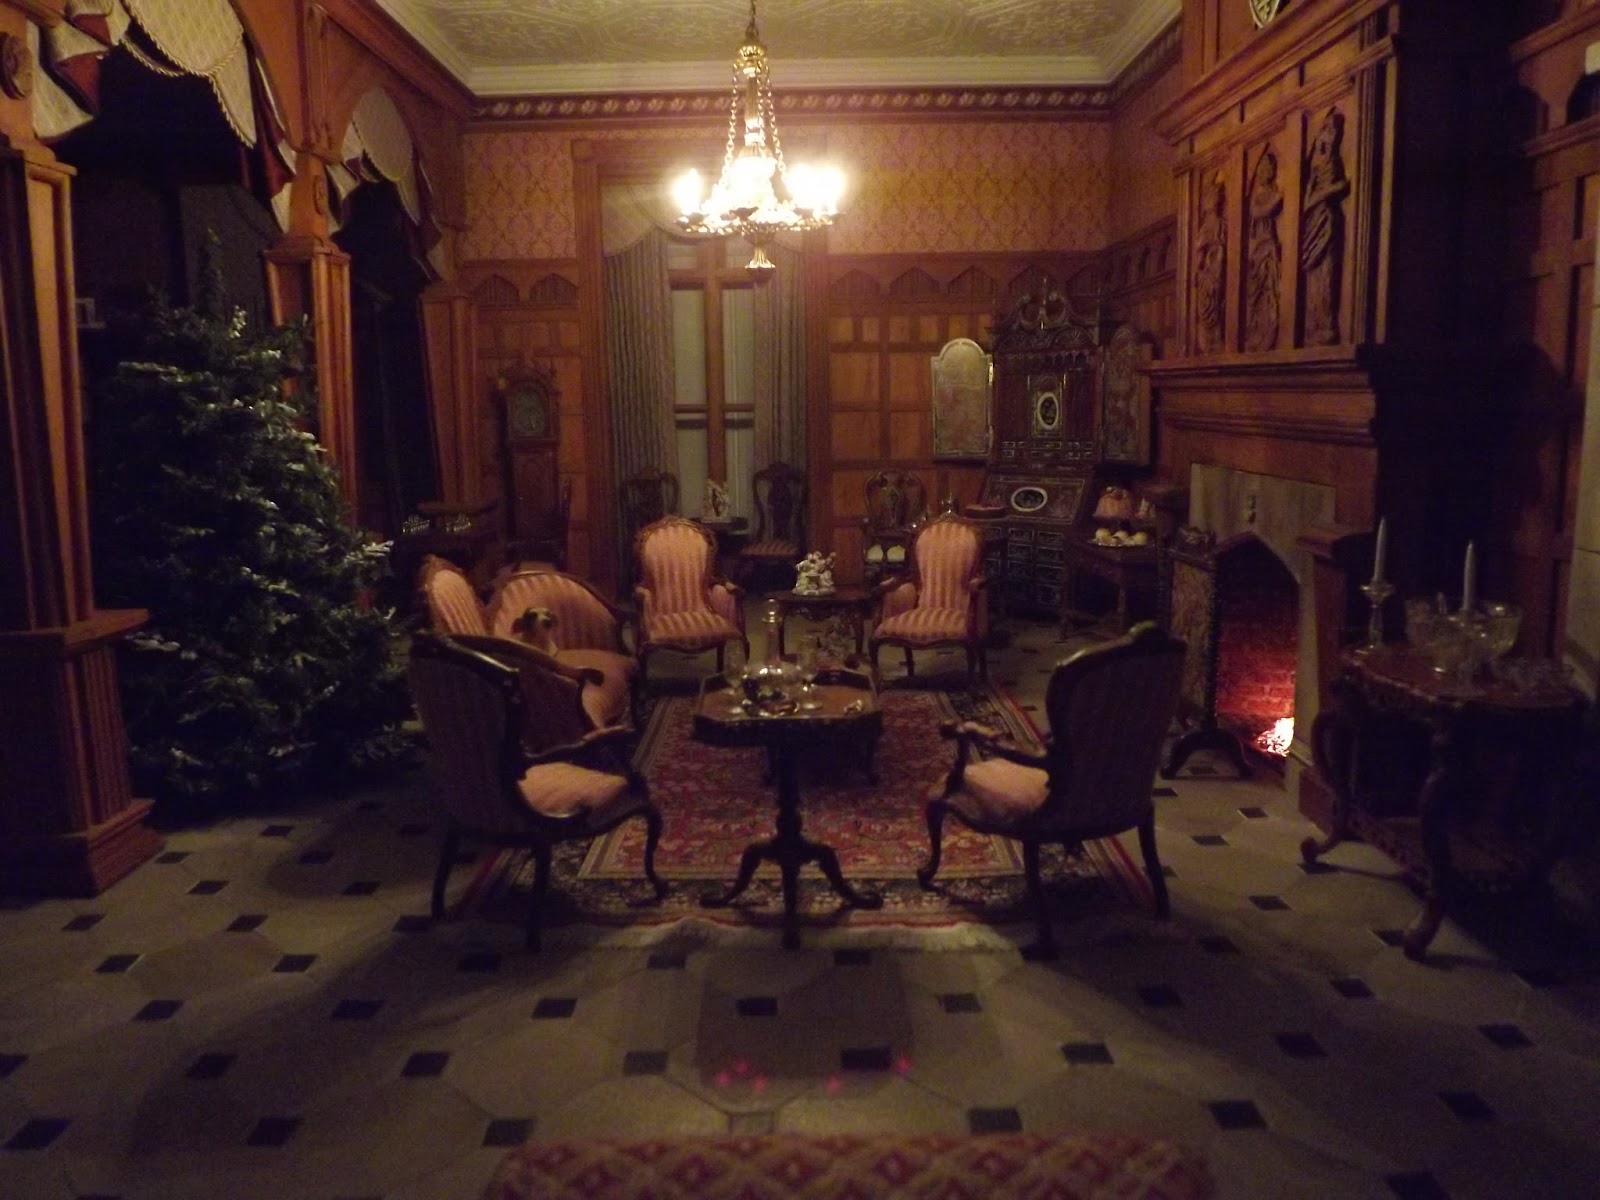
Jo really loves window seats, so these are for him.


And that my friends is all I have in terms of progress. And now...

New plans (another room to be gutted)

Jo and I had a wonderful trip. we were with my in-laws and we had a great time and saw incredible places. My favorite stop was the Royal Pavilion in Brighton. I could have stayed there all day. It is one of the top 3 buildings  I have visited (sorry, we could not take pictures. Naturally, this gave me many ideas and I did a lot of drawing on the cruise ship.

The first renovation plan has resulted in dirty looks from most of my family...I am redoing the kitchen.


Don't get me wrong. I love my kitchen and thought it was great for a smaller house, but since the Manor will now have a banquet hall for 14 people, I can't see the chefs cooking an elaborate meal on that small Bodo Henning stove. So, the new kitchen will look like this...


It will be 7 inches deeper. The left wall will have, from back to front, 4 baking ovens, room for a hutch, a centre range 8 inches long, room for a second hutch, and finally at the front of the room will be a 4 1/2 meat roasting range. The opposite wall will have a wider scullery and maybe a mezzanine style store room. The door on the back wall, which was a fake in the current kitchen, will become a working door to the Tudor hall

The other room I worked on is the banquet hall. After the Royal Pavilion, I have had a million ideas. I have not finalized my plans, no where near actually, but here are my first sketches of the direction I am going in:


Trip to Europe

Before I show you pictures of places we visited, here is a picture of items I purchased for Dewell Manor:


The tall statue at the back and the pewter pieces at the front were purchased at the British Museum and will go in the art gallery. The two thuribles are key chains from Santiago de Compostela which will hang from the arches of the prayer room. The rest of the miniatures as well as the red wallpaper for the new banquet hall came from Ananda in Barcelona.

I visited 2 miniature shops in Barcelona. First we went to Evolve. I was there for 45 minutes. the entire time I was there the lady at the cash said 2 things to me. She barely answered me when I came in and said ''hola''. I did not find much but then on the second step of a staircase which clearly led to a private loft above I saw molding strips individually packaged and priced which was exactly what I needed...yay! I went up the 2 steps and the lady yelled ''Hey...No''. I guess she thought I was going upstairs but when she saw me looking at the molding she didn't say anything. When I went down the 2 steps, Jo told me the woman had been glaring at me for the 15 minutes I was looking at the moldings. I put them back and walked out of the store. I cannot remember the last time anyone was so rude to me in a shop. I will never set foot in Evolve again.

Luckily, When I went to the second shop, Ananda, I was greeted by Felicidad who was kind, welcoming, and very helpful. They have beautiful pieces, many of which they made themselves, and she took my to the back room and let me go through all the wallpapers and building material they had. They can count on my going back the next time I visit Barcelona!

And now, since some of you asked, here are just a few pictures of the places we visited:

Cathedral at Santiago de Compostela

I was enchanted by this side of the building

Queluz Palace in Lisbon

A reception room in the palace. It felt like a cozy Versailles.

Cathedral of Murcia in Cartagena

A beautiful building in Cartagena

Museu Nacional d'Art de Catalunya

A view of Barcelona from the museum

We saw some incredible places, the sea was calm, the weather was good, The Royal Pavilion blew me away, but this trip just confirmed that our favorite city in the world is Barcelona.

And that is all I have for the moment my friends. My house is decorated and my Christmas shopping is done, but I think miniature time will be limited till the holidays.

I hope you all have a lovely month of December. I have a week off for the holidays and I hope to spend a good portion of it on the manor.

Until next time, thank you all for your great kindness and support. It means a lot to me and I hope I give it back,

Giac


Sunday 27 September 2015

Ballroom paneling,ceiling and plasterwork update

Good afternoon everyone!

I hope you are all well and having a good weekend. Thank you all for your kind comments on my last post. I appreciate them very much. The ballroom is finally starting to take shape.


The first element I completed was the paneling on the walls. In the past I have created paneling using pre-painted wood strips. It looks great except that you see each piece. Since I wanted the paneled walls to look like plaster, I cut double ply illustration board pieces to fit each wall and cut out the panel openings according to my design


The above picture was a test run. I liked the panels and everything lined up with opening I cut out in the structure, so I was good to proceed. I needed to make the walls deeper to for the nooks I purchased. Also, I decided I wanted walnut window shutter instead of curtains so I needed at least 1 inch deep walls to make it look real. I had 5/8 mdf leftover from the structure, and I had 3/8 inch plywood leftover from our real life bathroom renovation. I used these and a few basswood strips to get the depth I needed.
 

I used the mdf over the cut out panels, and the plywood behind that. It worked well, but this section of the Manor will be really heavy. I could have used basswood strips to create the depth, since I had the leftover material why use up my lumber. When that was dry I flipped it over, painted the illustration board with 3 coats of paint using a sponge brush, and then added the molding


I used carpenters glue to glue the mdf and plywood, and then I used the Ultimate Glue and dots of super glue for the molding strips. Whatever glue you use, just make sure it is paintable. When that was dry, I flipped the structure so that the wall I was gluing in was parallel to the floor, dropped it into place and  weighed it down with books and weights (this was also glued with carpenters glue).


The next step was creating the dropped ceiling for the colonnade.


It is simply vertical spacers and the horizontal ceiling strips. I was worried it might be a bit dull so I took more double ply illustration board and cut out openings that lined up with the wall panels.


The lowered ceiling goes just low enough to accommodate the columns and pilasters that will create the colonnade. With the walls and colonnade dropped ceiling done, I started working on the plasterwork ceiling in the center of the room.

I had planned on gluing everything onto the mdf directly, but it god nicked during construction so I just used more double ply illustration board.


I cut a piece to fit then took 2 evenings to measure and plan the elements. I planed on painting the ceiling before gluing the plasterwork. This meant I would not see the pencil lines.


Before painting,  I used my utility knife to score the medallions and the rays emanating from them which are for the plaster bows. This way I would see traces of the scores and know where to glue everything. The 2 square cut-outs will be covered by the medallions. Ray gave me a great tip. He suggested cutting a cavity in the structure over the medallions. This way, when I attach the chandeliers, I can just push the wires into that space. I also cut out openings for the corner blocks and spandrels.


The plaster elements are different thicknesses. In the picture above you can see I cut the opening in the double ply illustration board, and used a piece of single ply board under the corner block so it would line up with the spandrel. I glued these down first and used these to line up the boarders.


For the boarders I used single ply board cut to the width of the panels I bought. I glued on the panels and the rosettes before installing them.


The reason for the illustration board is to get the border to the height of the molding I wanted to use around all the plasterwork. I have 4 medallions for this room. 2 for chandeliers and 2 that are decorative. Before I painted the ceiling I drilled holes to help line up the decorative medallions.


I put a copper pipe into the hole and slipped the medallions into place. I did not glue down the chandelier medallions because that will only get done when I install the fixtures, so I used double sided tape to keep them in place while I glued down the plaster bows. I glued one final rosette in the center and the ceiling was done. The last thing I did was attach the plasterwork on the wall panels.


In the picture above the cornice and the vertical strips behind them are just for show. The blue strips will sit over the columns so I will only glue them down after the columns are in place, but it gives you a feel for the space. All the plasterwork was glued down using the Ultimate Glue and gel Super glue. The super glue is just to hold the pieces in place while the other glue dries. These were way to delicate to weigh down while the glue sets. That's all I've done, so here are a few more pictures for you


In case you were wondering where the inspiration for the ballroom came from, the visual is from the entrance at Badminton house.


This is one of my very favorite rooms. I took that inspiration and incorporated a colonnade, and voila.

The next step is to turn the stricture right side up and make the floor. Jo and I are going on Holiday in 3 weeks, so it will be a while before my next post and I will not be commenting on your blogs during that time. We are taking a short cruise of Spain and Portugal leaving from Southampton and ending in Barcelona. We will arrive a few days early, so we planned a day at Brighton to visit the royal Pavilion which might give me ideas for the Chinese Banquet Hall.

Thank you all once again for your great feedback. It means a lot to me and I repeat, if you follow me and I am not following you, please let me know.

I wish you all the best and send you great big hugs
Giac