
I hope you are all doing well and that life is treating you kindly. Yesterday I finally finished the Breakfast Room. It is one of the smaller rooms of the Manor, but the finishes were a lot of work. So without further ado, here it is


You may remember this room was originally going to be a loggia, but I had a really hard time visualising the space. I went from a very Tudor brick and wood beam design, to an Alhambra inspired design, then a mosaic Loggia as per the Breakers. I decided to stop thinking about it as an open space and thought of the breakfast room in the Elms, my favourite mansion in Newport, and I fell in love with the idea and it all came together.
Here is what the structure looked like when I started,

The first step was to design the space. The space measures about 13 x 13 inches and I knew I wanted a fireplace and large arched windows between the columns,

I cut all the wall sections I needed out of double thick illustration board and used basswood strips to frame them properly.

Building the elements of the room was simple enough, but there were many so I'll go over them one at a time (sorry, it might be a long post) ;)
Fireplace and Overmantel
The focal point of many rooms for me is the fireplace. I love fireplaces! Like most of what I do it started with a simple structure made from illustration board, basswood framing, and basswood molding,

This is the wall section which is removable. The cutouts on the left are for the chinoiserie panels, and the ones on the right are for the firebox and the overmantel.

The fireplace is pretty straight forward. The front is illustration board, the sided and frame are basswood, and the curved top part is made from cardboard shipping tubes. It took a bit of fiddling to cut the 3 pieces to fit, but I love the look of it.

To fill the void between the arched top of the front piece and the curved tube section I used regular spackle. The resin corbels are from Unique miniatures. I found some circle jewelry bits and used them to add a little detail to the front piece. I just sanded them lightly and glues them on. When it was assembled I put on several coats of gesso, sanding between each to make the mantel look like one big carved piece.

Originally, as per my drawings, I wanted a chinoiserie panel over the mantel. Since the chimney was really deep I decided to use the space and make shelves. Again, the back of the unit is illustration board, the sides are cardboard tubes, and the shelves and back frame are basswood.

At this point it was time for a dry run to make sure I was happy with the design.

To cover the gaps between the cardboard tube and illustration board of the shelf unit I used a piece of thin cardboard cut to the height of each shelf section. Actually I used the back of a workbook. the cardboard was thin enough that it could be curved without bending.

To finish the fireplace I made a simple firebox with illustration board and some leftover plastic brick sheet I had. I love yellow and black as a colour combination so I painted the mantel to look like giallo sienna marble and used jewelry bits and leftover materials to make the black insert. I glued it together, painted it with black paint, and sprayed on several coats of clear glaze to make it shiny.

The next step was to faux finish all the structural elements and let them dry. I decided to put marble columns between the window section so the fireplace would not stand out too much...but I must say I am very proud of this mantel.

Chinoiserie Panels
The next element was the chinoiserie panels. you may remember the Chinese tea room which already had this look. I love chinoiserie and have no problem using the same trick twice. However I decided the panels in the breakfast Room would be only black and gold.

I make a lot of detailed drawings, but when the time comes to paint them I never try to copy exactly but just go with the flow. These panels are much bigger then the ones in the other room so I tried to paint more detailed buildings.

And here are the finished panels. I asked an artist at the art supply store what to use to get the smoothest black base and he suggested a sponge roller. It looks okay, but I think I got a smoother finish using a fine brush and watering down the paint a little.

Here is a close up of one of one panel. I could have added more detail and people, but as I have said many times I am not incredibly gifted at painting and I do not enjoy it. I am one of those people who's hands shake a lot when I am doing fine detail work so I decided to stop before I messed up ...but I do like the effect.
The Floor
As mentioned in my last post I originally planed on making a simple square pattern on the floor, mainly because the room was already taking so long and I was at a standstill until the floor was installed. My husband told me, very diplomatically, that I could do better and 2 of my dearest friends told me my signature in miniatures are my floors, so I went back to the drawing board.
First I made a template of the room and cut it out of illustration board
 |
| I drew on guidelines for the wood pieces |
Next I drew up the pattern of the floor design and numbered each piece. I started by gluing down the centre of the medallions...

Then all the dark wood frame...

next I filled in all the sections

And finally I put 2 coats of shellac and waxed the floor, then glued it down.

For friends who are new, I use shellac flakes dissolved in 99% Isopropanol. The flakes come in different colours and I think it makes a really beautiful finish. I used regular dark floor wax to finish it because it fills any holes or cracks nicely and adds to the "old floor" look. The marble is a piece of illustration board I painted leftover from the Entrance hall floor.
The Ceiling
The ceiling was a cast piece I used in the Chinese Tea Room and the Prayer room. Because it is about 1/2 inch thick I put down a basswood strip spacer all around the room to hold the crown molding. I then painted it off white.

Next I made a template of the ceiling and cut it out on the cast pieces. It chipped a lot when I was cutting it but I was able to camouflage a lot when it was painted. Since there is a lot of light in the room I decided to paint the ceiling blue to mimic the sky. I painted it off white, then filled in the blue section, did touch ups, then painted the gold detail. I glued it down and then installed the pre-painted crown molding.

Here is a look at it right side up against the wall sections.

Windows
The first step was to take the wall sections and glue in a structural frame for the windows the same thickness as the acrylic pane I used.

I then cut my window molding and assembled the individual frames

I glued them onto the spacer frame. The window frame was just a bit wider then the spacer so I turned it over and glued down the horizontal mullion strips which were the same thickness as the spacers.

The last step was to install vertical mullions strips. I just cut one long length and glued it over the horizontal ones. The illusion works well and then I glued down the acrylic pane. I originally planned on carving sea shells to put over each window and panel section, but I found some jewelry bits in the shape of suns at my mom's house and thought it would be appropriate for the Breakfast Room. I sanded them, painted them and glued them down.

I wanted proper Victorian curtains to finish the room but was worried that it would block the windows since that is the only way to see this room. I tried making just 2 or 3 pleats but it was just too much with the windows and the columns so I decided to make wood shutters. I cut all the lumber I needed, put a few together and when I had a test fit those also took away from the room so I decided not to put anything at all. I actually like the room as is. This room faces north and the rose gardens, so I don't think drapes would be necessary to protect the furniture.

Ray Whitledge showed me how to make the tablecloth and I think it adds just enough yellow to the room to balance it out.
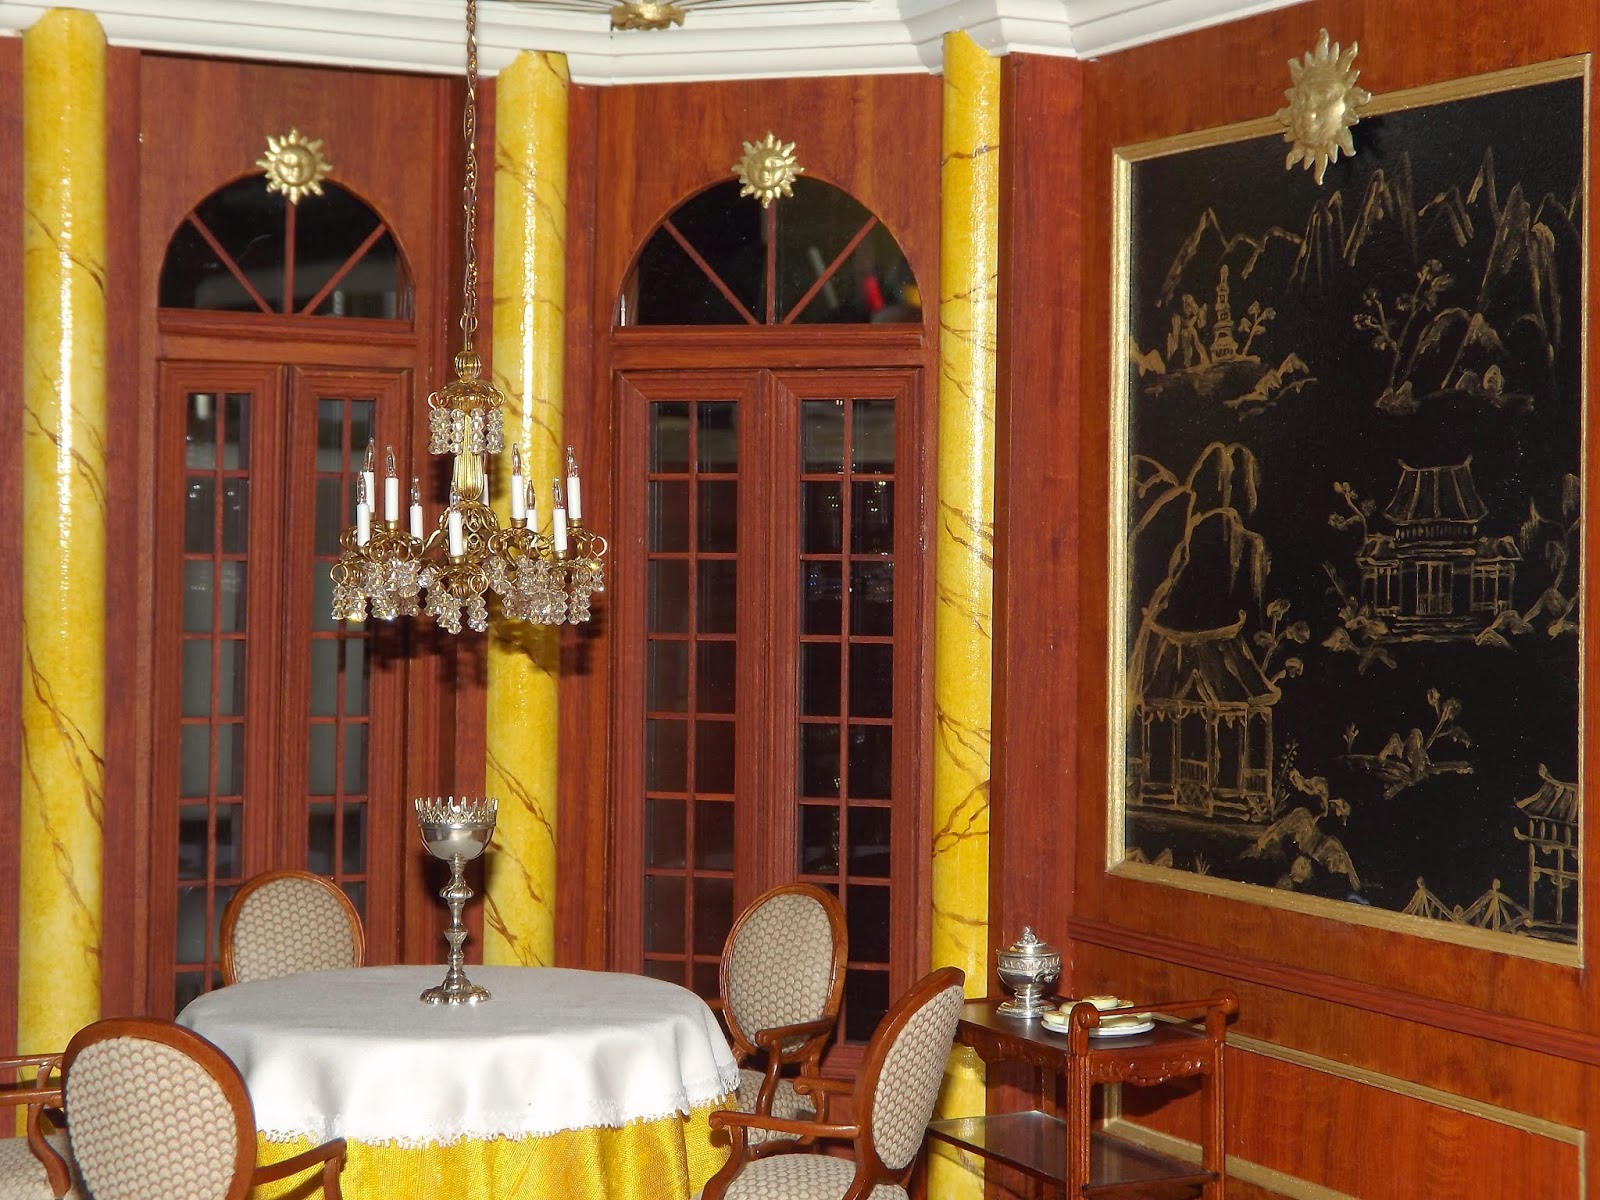
And that is all my loyal friends. Here are a few pictures of the finished project:
shots of the empty room

 |
| Jo commented that the black column base looked wrong, so I added white veining to make them look like marble. |
This is what it looks like for the exterior. The window section are glued down, but the door section comes off so you can get a better view. I am not sure if the top will remain a balcony, or if I want to build an iron and "glass" conservatory.
 |
I made the fireplace wall removable so I could get into the room to place furniture and accessories and also do any repairs that might be needed. The thickness of the floor and the crown molding act as stopper to keep the section in place.

The chandelier goes in the countess's bedroom. I plan on purchasing the Antoinette chandelier from the Getzans for this room.

And that my dear friends is all. It was a long room to make, but I must admit it is one of my favourites in the Manor. My next project will be renovations to finished rooms. I will try to post in 2 or 3 weeks with updates.
Thank you all once again for all your support and kindness throughout my mini adventures. I feel very privileged to have you all as followers and am always inspired by your work.
I send you all a great big hug,
Giac


